Step 1: Set up your appointment schedule
- On a computer, open Google Calendar.
- At the top left, click Create
 .
. - Click Appointment schedule.

- Enter a title.
- To set an appointment duration, click the down arrow .
- Appointments must be at least 5 minutes long.
- Set the date, time, and time zone of your appointments.
- You can set up a one-time appointment or a recurring schedule.
- Tip: To add multiple time slots for a single day, click Add another period to this day
 .
.
- Choose settings for your appointment availability, such as your scheduling window or days when you won’t be available. Learn about customizing your availability.
 .
.
You can choose the method of conferencing that you prefer.

You can even modify the booking form

- Choose a primary or secondary calendar where you want to add your appointment schedule.
- Tips:
- Once you create an appointment schedule, you can’t edit it to be on a different primary or secondary calendar.
- Anyone with edit permission to a secondary or primary calendar can make changes to the schedule and view incoming bookings. Learn more about access permissions.
- Tips:
- Optional: To avoid conflicts for events created or accepted on primary or secondary calendars, under “Calendars,” select Check calendars for availability. Then, select all calendars for which you don’t want bookable times to be available during any created or accepted events.
- Important: Each appointment slot on a booking page can only be booked once even with this feature turned off.
- To add co-hosts to the appointment, enter the co-host’s names or email addresses.
- Tip: You can add up to 20 co-hosts within the same organization. Google Groups can’t be used as co-hosts.
- Click Next.
Step 2: Set up your booking page
Important:
- Email verification is only available for eligible Google Workspace plans.
- For eligible Google Workspace and Google One plans, you can send up to 5 reminders before each appointment.
- To accept payments for appointments, a Stripe account is required. Learn how to accept payments.
- Review your booking page photo and name.
- The photo is taken from your Google Account. Learn how to change your photo.
- Booking pages don’t show a photo for appointment schedules created on secondary calendars.
- Select a location and conference options for the appointment:
- Google Meet video conferencing
- In-person meeting
- Phone call
- None / to be specified later
- Add a description that explains your service.
- The description shows on your booking page and in confirmation emails.
- Add fields for your attendees to fill out.
- Attendees must provide their first and last name and email address.
- To add more fields:
- Click Add an item.
- Click Phone number or Custom item.
- Select if these fields are Required or Optional.
- To prevent bots, click Require email verification.
- Optional: Turn on appointment payments.
- Connect a Stripe account to Google Calendar.
- Check the box next to “Require payment when booking.”
- Enter an amount and currency.
- Add your cancellation policy.
- Set up confirmation emails and reminders for your emails.
- You can send up to 5 reminders.
- Click Save.
To modify your calendar simply click on any appointment block on your calendar

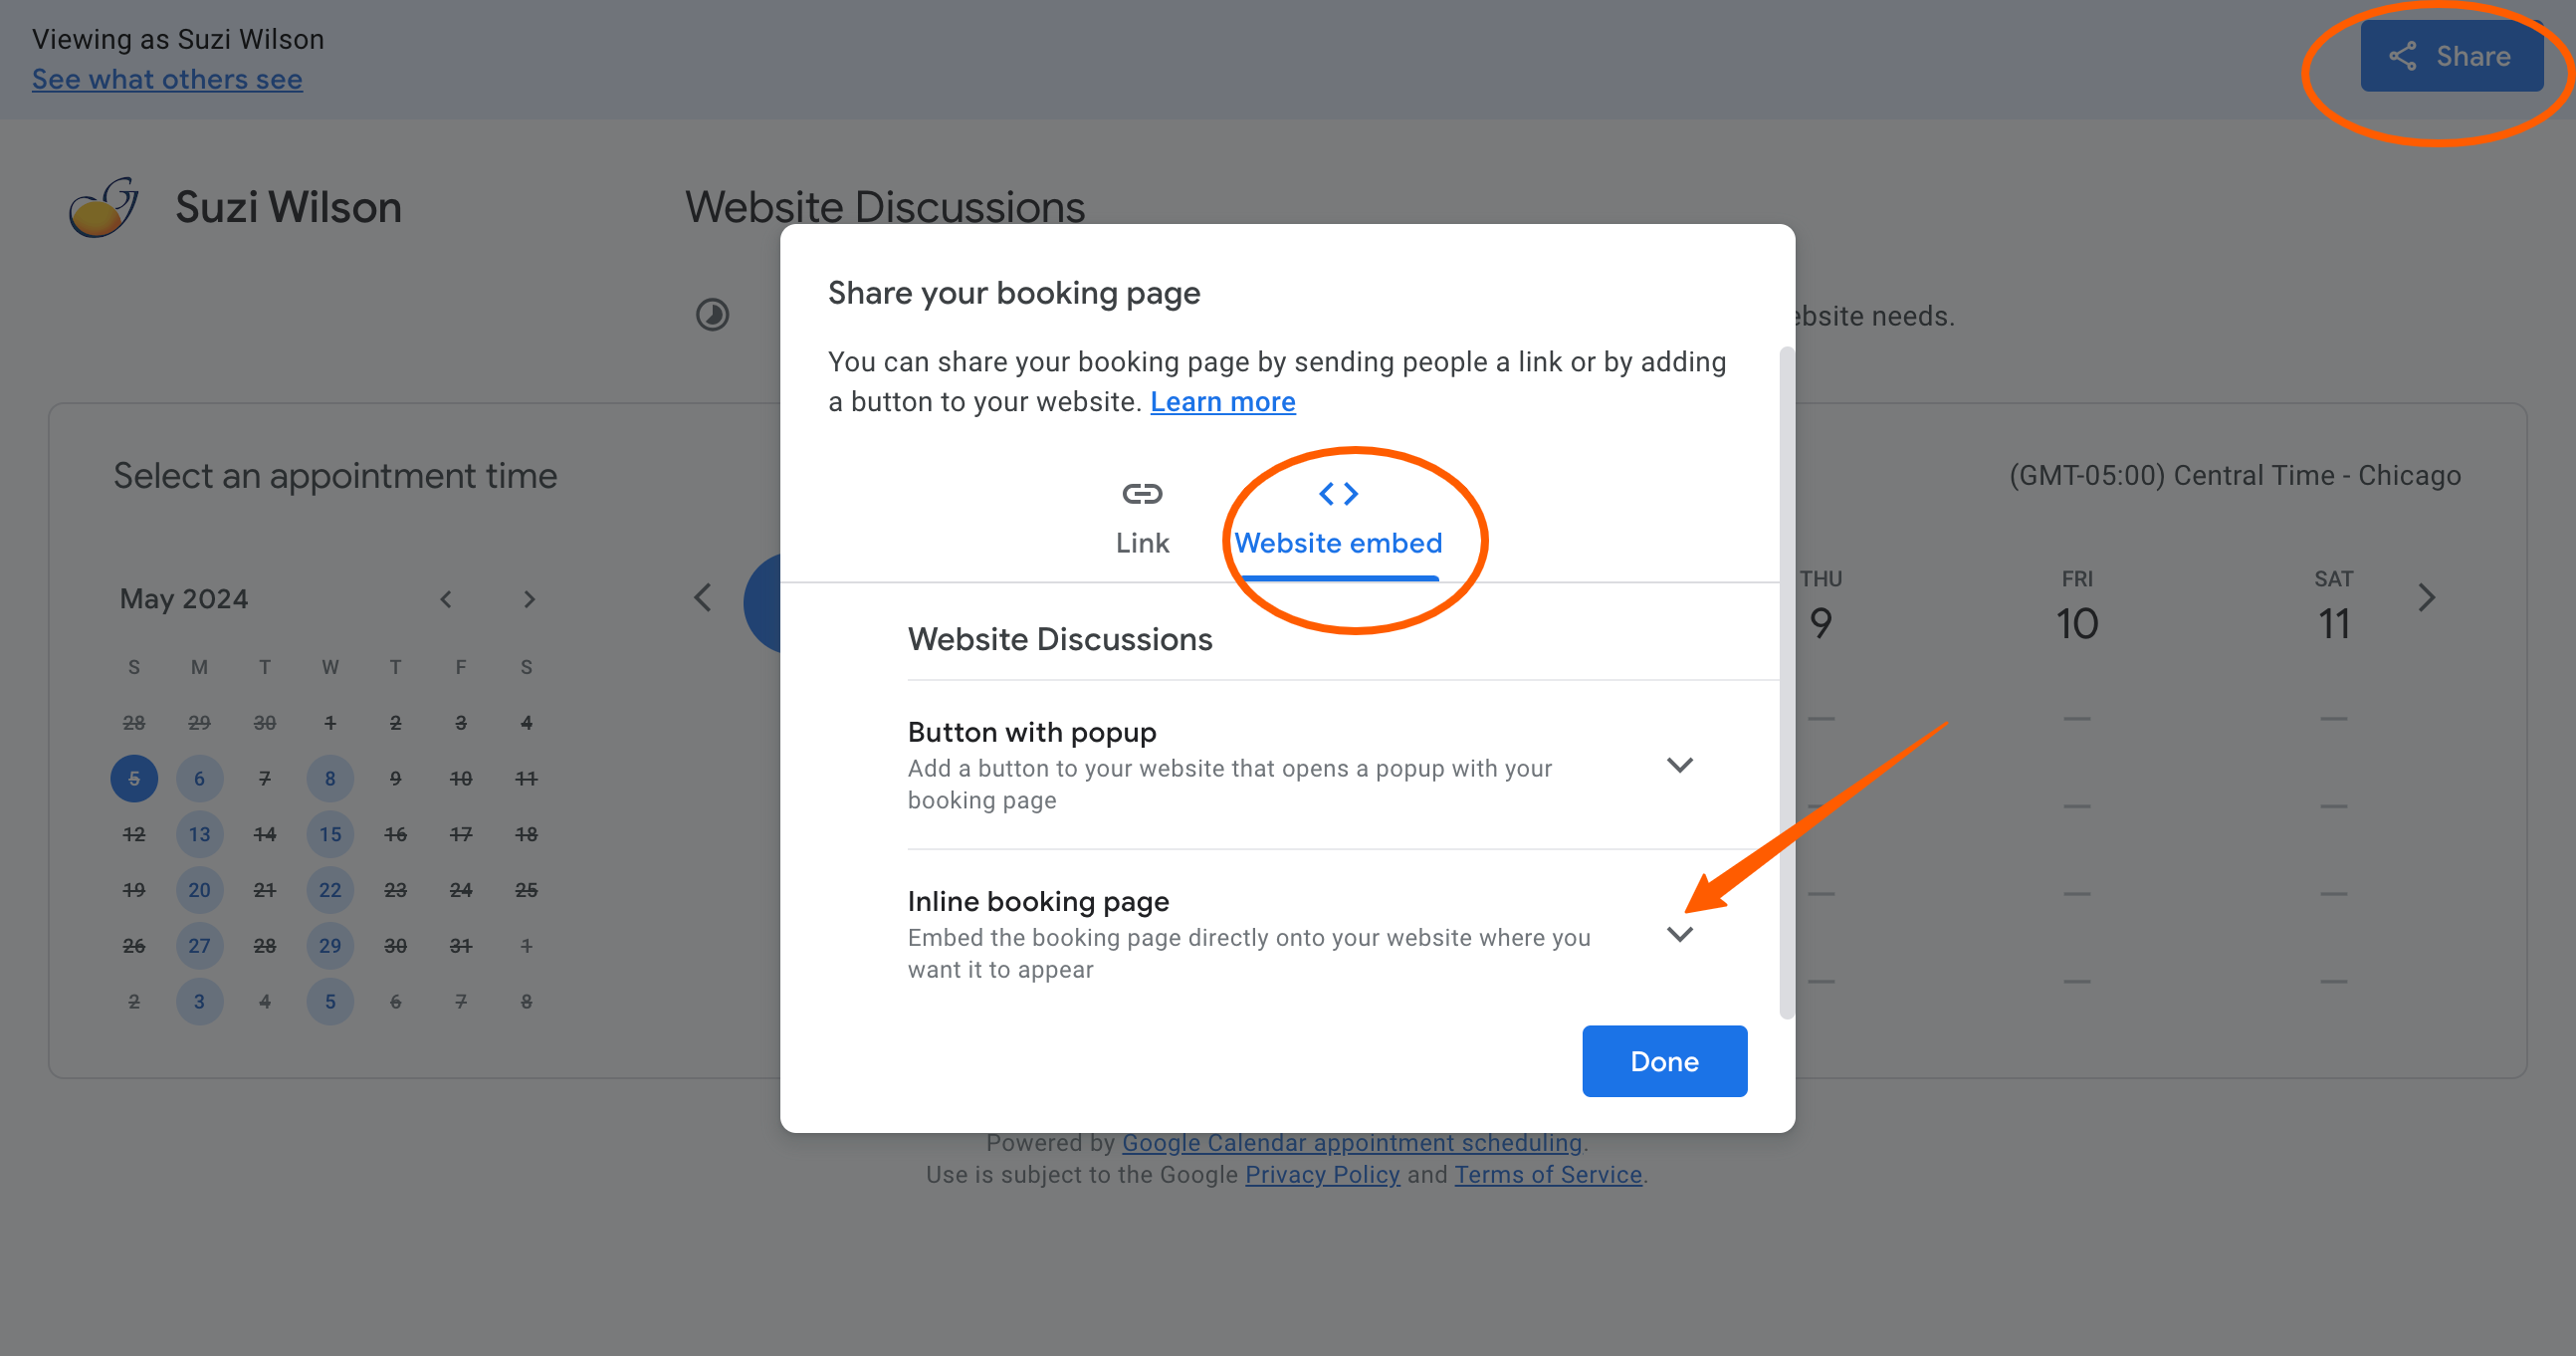
Add your calendar to your website
To get the HTML code
- click on the Share button in the upper right corner
- click Website embed tab in the pop up
- select either “Button with popup” or “Inline booking page”
- copy the code and either send the code to your web developer or paste it in a code module on your website.
Tip:
- In Week view or any Day view, you can create or add availability to an appointment schedule when you click any time on your calendar. Click Appointment schedule in the window that appears.

0 Comments